Language:
How to Use doola Books for Invoicing and Bookkeeping
Managing your company’s finances doesn’t have to be overwhelming. With doola Books, you can take total control of your company’s finances in one convenient place.
This guide will walk you through the features, tools, dashboards, and insights that doola Books offers, so that you’re equipped to make the most of this comprehensive financial management tool.
Navigating the doola Dashboard
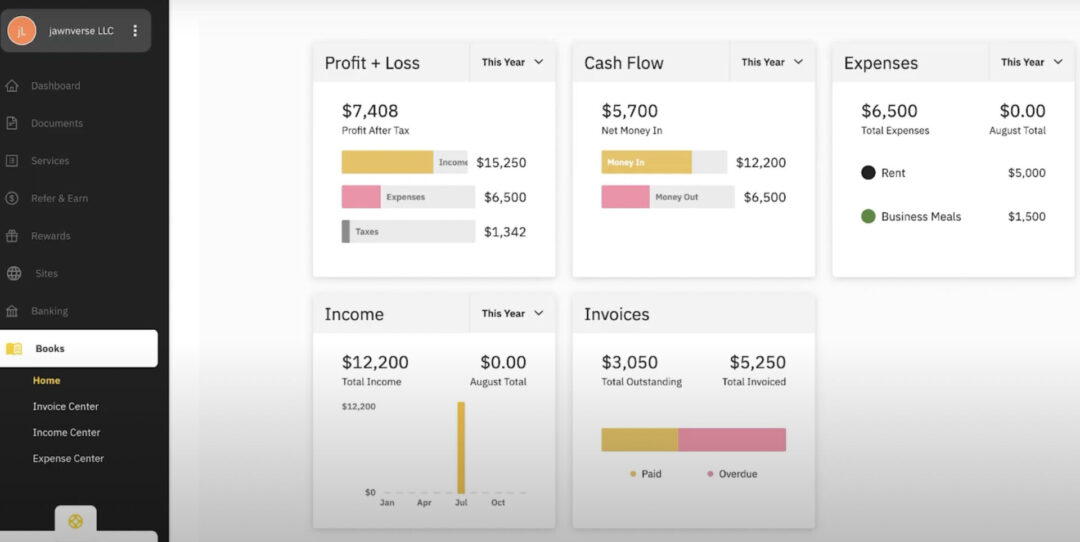
When you first land on the doola dashboard, you’ll notice the “Books” tab on the left. Click on it to access your doola Books home, where you can find a summary of your company’s key metrics at a glance.
Five key categories are displayed:
- Profit and Loss
- Cash Flow
- Expenses
- Income
- Invoices
This dashboard gives you a quick overview, but you can also double click on any of these categories to access more detailed information on those metrics.
For example, clicking on the graph under “Profit and Loss” reveals a detailed bar graph of your financial distribution over time.
The same applies to “Expenses,” “Income,” and “Invoices,” providing you with more granular insights.
How to Use the Invoice Center
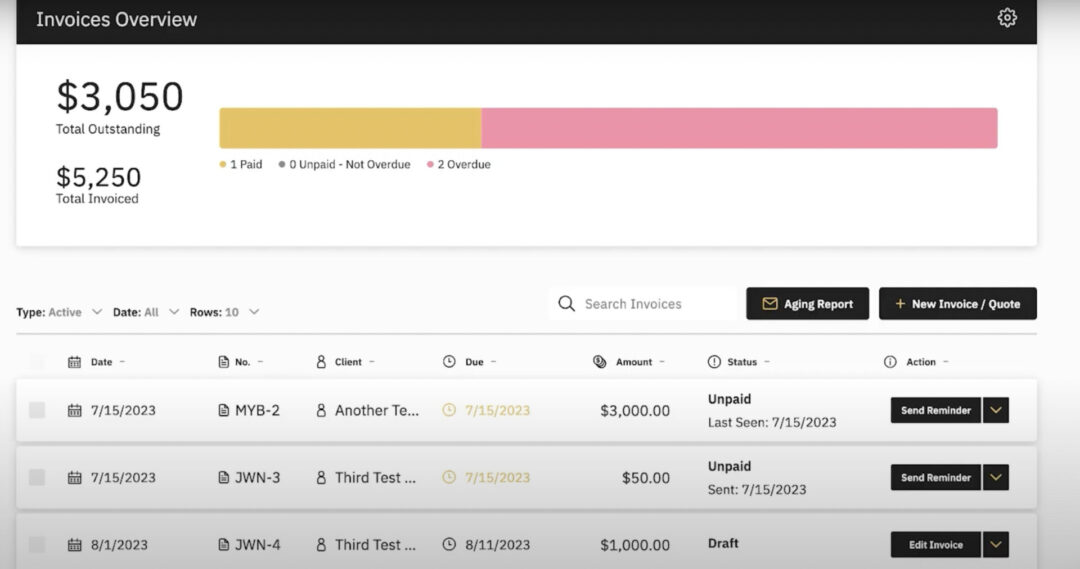
The Invoice Center in doola Books is a powerful tool to manage your invoices efficiently.
Here’s what you can do:
Monitor outstanding invoices
Easily view all outstanding and completed invoices.
Aging reports
Send aging reports to capture outstanding invoices over specific time periods, enhancing visibility for you and your team.
Actionable options
Take actions such as sending reminders, duplicating invoices, adding payments, sharing, and printing.
How to Create a New Invoice
- Click on “Add New Invoice.”
- Fill in business details, client information, and invoice amount.
- Add items, attach files, and customize the message.
- Set invoice date, terms, and frequency (this is very helpful for fully automate this part of your business).
- Preview the invoice and choose payment options.
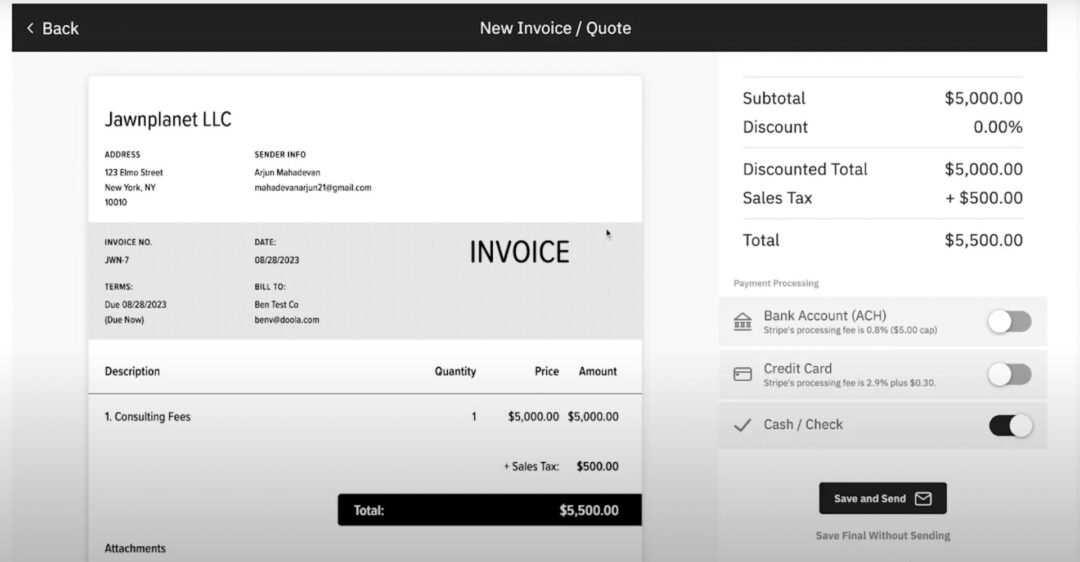
You can also choose to link Stripe to accept payments via bank account or credit card. Simply click on the toggle and link Stripe using Stripe Connect, or you can accept cash or check.
PS: Don’t sweat it if you’re not sure! You can always save the invoice or save it without sending it, but if you’re good to go hit that button and send the invoice.
Once the invoice is out you’ll see it show up in your invoice center right at the bottom of the list.
How to Use the Income Centre
The Income Center offers an overview of your company’s income.
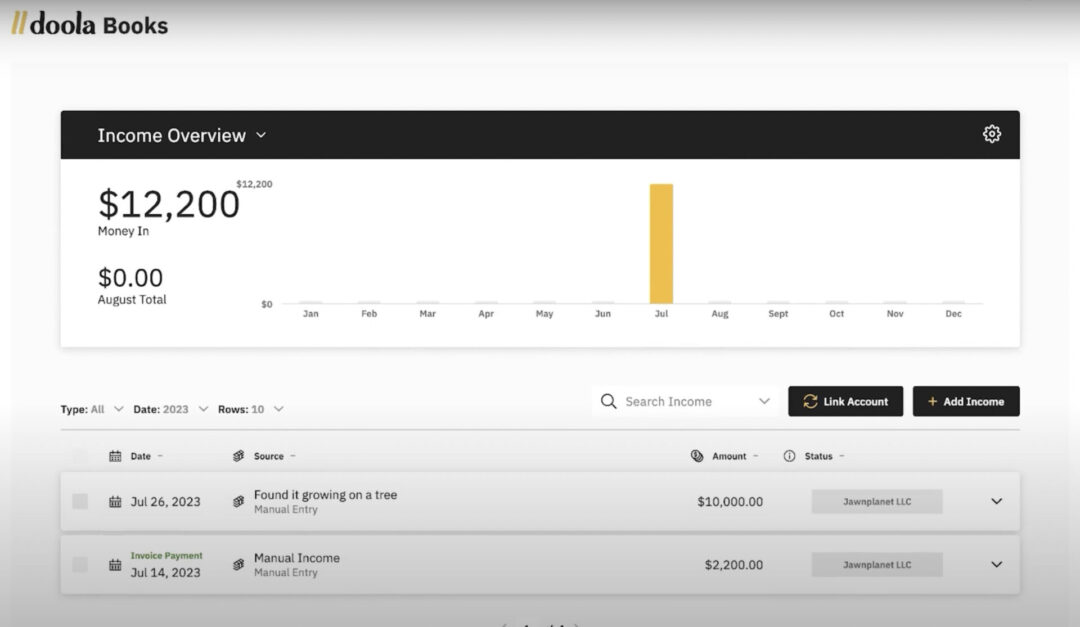
Link External Accounts
Easily link your bank accounts to automate income transactions. They will be pulled in and displayed here. Simply click the link accounts button.
Manual Entry
You can also add income manually by specifying date, description, amount, and additional information on how the income is generated. You can also upload any files or receipts for future reference.
How to Use the Expense Centre
The Expense Center provides a comprehensive view of your company’s expenses.
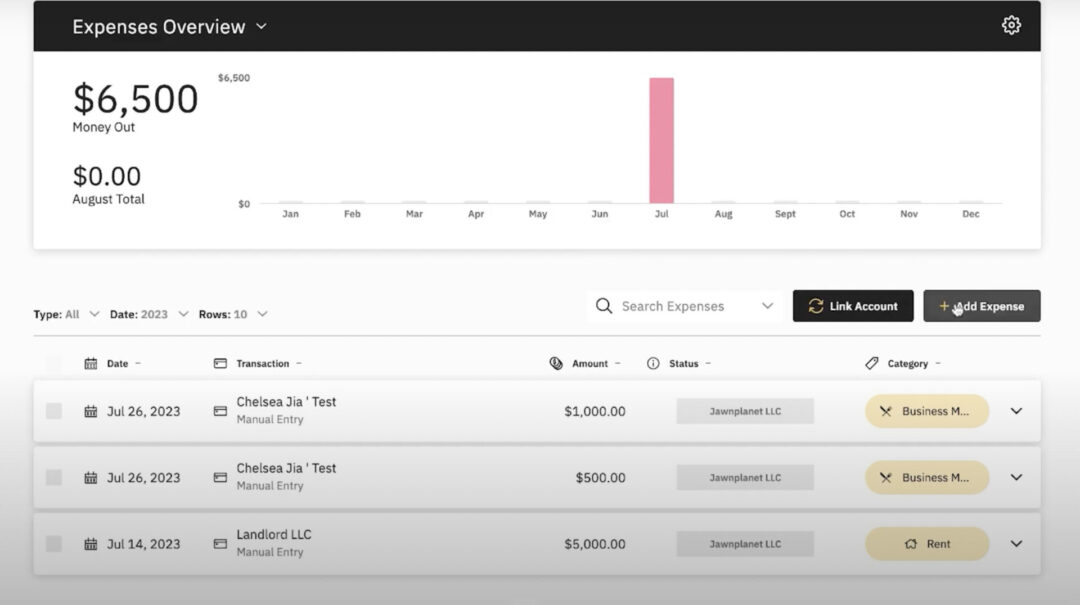
Here’s how to use it:
Link External Bank Accounts
Automate expense tracking by linking external bank accounts.
Manual Entry
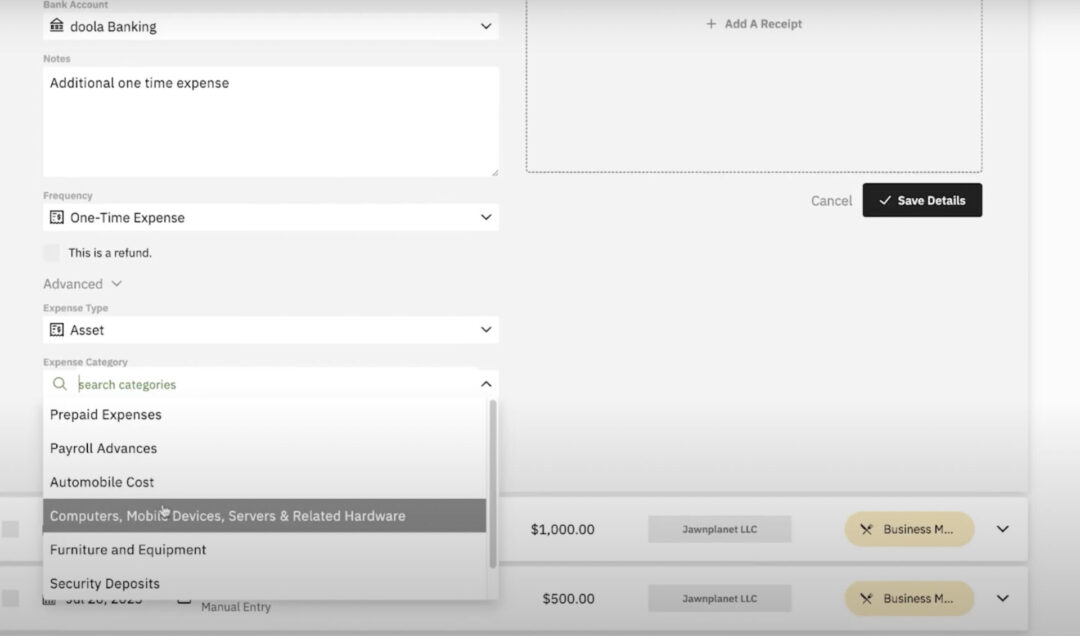
If you don’t want to link a bank account, you can add expenses manually, including details like date, amount, description, and receipt uploads.
Advanced Categories
Specify expense type and category, and determine if it’s a refund, a business or personal expense, or anything else. Although, we highly recommend you keep personal and business expenses separate.
As you can see, with doola Books you can streamline your invoicing, effortlessly track income, and efficiently manage expenses.
This comprehensive tool allows you to focus on what you do best while doola handles the financial details.
Get Started With doola
Your success is doola’s success, and we’re here to support you every step of the way.
If you have any lingering questions or need more guidance, feel free to reach out – we’re committed to making your bookkeeping journey as easy as possible so you can focus on building your business.
Thank you for joining us on this exciting mission to empower founders worldwide. Let’s turn dreams into successful businesses together!


